Arwen’s Blood Red Gown
- Sam Anderson

- Nov 13, 2025
- 5 min read
I have finally started my sewing blog! I uploaded the introduction post several weeks ago then got sick for all of October. Ain’t that just the way? Now I’m finally ready to sit down and make my next entry but……..what should I write about?! I thought, maybe I should write about a project that I’ve made that turned out amazing? Or a piece that ended up being awful - a relatable learning experience? I want to share it all and have so many thoughts in my head! I feel like most other creatives understand that struggle haha!! So let’s do both - I’ll write about a recent build that had ups and downs and is nostalgic too: Arwen’s Blood Red Dress.

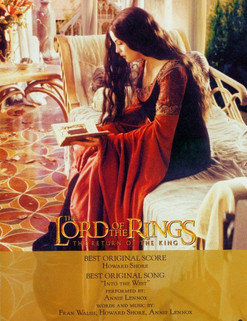
The Blood Red Dress, also called the Dying Dress, imprinted on my brain the very first time that I saw The Return of the King. Arwen is one of my favorite characters in the Lord of the Rings series. In the films, she is portrayed by the beautiful actress Liv Tyler. All of Arwen’s costumes are lovely and full of detail - a cosplayer’s dream - but the majority of them are very light colored. There’s lots of white, lilac, silver and pale green which are pretty but not colors that I personally like to wear. Then Arwen chooses to give up her immortality and stay in Middle Earth to be with Aragorn and her life becomes tied to the fate of the Ring (at least in the films). It’s during this period that she wears the Blood Red gown which adds a somber note to these scenes. The dress stands out against her pale complexion and the red and navy velvet are such rich, warm fabrics that seem at odds with her other dresses. Clearly I’m in love with this costume and needed to make my own version.
This project was certainly an emotional roller coaster. It reminded me that it is always best to plan out a project beforehand and if you’re going to make major changes halfway through - stop and adjust your plans. I purchased the fabric for Arwen well before I actually started working on the dress, which is common for cosplayers and other costumers. I was able to find some polyester velvet in the perfect shades of navy and red in the LA Fabric District in the summer of 2023 when I was on vacation in California. I finally started the project this year, in February 2025. Originally, I was going to use the pattern that Simplicity had put out when the film was released. That version is a single dress with decorative details. It was going to be a “close enough” style cosplay. But the more I thought about the project and about how much I owe my love of fantasy to LotR, the more I wanted to do the project to the best of my ability. So I decided to make the gown as close to the film as possible, meaning that I would actually have to make TWO dresses. The Dying Dress is actually two separate dresses - an underdress with the collar & large sleeves and a sleeveless overdress.
Since I had changed my plan from one dress to two dresses, I knew I wouldn’t have enough velvet. So I decided to make the underdress out of lining fabric anywhere the fabric wouldn’t be seen. It would keep the two dresses from sticking to each other and save on velvet. I went with a tried & true pattern of mine, a modified Robin Dress from Scroop Patterns where I had removed the front button placket. I pulled my pattern out and started tracing the first piece onto the navy velvet, making sure to extend the dress hem to be floor length. Then I cut that piece out and moved on to the next. I had skipped the mockup since I’d made this pattern several times before. About halfway through the pattern pieces I realized that I was going to be short on fabric……like REALLY short on fabric. That’s when I realized my mistake. While I had remembered to cut my pieces out in the same direction (because of the nap of velvet), I had not taken this into account when purchasing the fabric. I bought what I always needed for this pattern - 5 yards. But since I couldn’t use the pattern fabric layout and had to cut everything facing the same direction, I was short by several yards. I felt so defeated! I had already cut up most of my fabric and couldn’t get more - I don’t live anywhere near CA. I set the project aside and worked on something else. Then I got myself some ice cream and started sourcing velvet online.


While I waited for the fabric swatches to arrive in the mail, I wasn’t going to let the fabric I’d already cut go to waste. I used the original velvet as the top of the underdress and sewed it to skirt pieces that I made from some Bemberg rayon lining that I had in my stash. Those parts went together pretty quickly and the next steps on the underdress were to do the collar and big sleeves. This time I did a mockup! I wasn’t going to cut the red velvet up and have it be wrong too! I actually used the sleeve included with the old Simplicity pattern and the mockup went together perfectly. Quite surprising for a Simplicity costume pattern from the 2000s! I self drafted the collar and made a mockup for that as well. Once it was hitting where I wanted it to, I moved on and made the collar & lower sleeves out of the red velvet. Lovely gold lace was also added to the collar. Arwen’s upper sleeves in the film are actually a paisley pattern, but I couldn’t find any red paisley that didn’t scream “Western cowgirl” so I went with a floral brocade instead. The brocade has a raised pattern in red & gold and has the same fantasy feel as the rest of the dress. The sleeves were the final pieces to the underdress. Now I just needed the overdress!


At this point it was now mid-March. After ordering several fabric swatches from multiple online shops, I chose a new navy velvet from My Textile Fabric. I ordered 8 yards (versus the 5 yards I had purchased before) and thankfully it arrived very quickly. I jumped right into the outerdress as soon as I got the new velvet. After all of the mockups, added lace details, and various fabrics used on the underdress, the overdress was a breeze! It came together really fast and once the brocade had arrived for the underdress sleeves, I used it on the overdress too. It was used as the small collar (almost an edge binding really) on the outer dress. The outer dress was now done too! I finished up with the small details like hand stitching the gold lace to the elbow area of the big sleeves, hemming both dresses and putting pockets in the outer dress.


It was done!! I’m so proud of how this came out. I definitely learned some important lessons about planning ahead and ordering 3 additional yards of fabric when dealing with velvet. The project started out as a “close enough” style cosplay and morphed into a fairly screen-accurate reproduction - which is obviously something that my little cosplayer heart loves. I ordered a new wig to go with the costume and wore my Evenstar necklace, a gift from my husband years ago. Arwen had her debut at C2E2 in Chicago this past April and I had the chance to do a photo shoot with the amazing Hayley Stein Photography. These pictures are beautiful!! Hayley was able to highlight the details of my project and capture the mood of the Dying Dress scenes from the film. I received so many compliments at the convention on my gown and I even got to meet actor Billy Boyd (who played the hobbit Pippin in LotR) while wearing my cosplay. What a fantastic debut for Arwen’s Blood Red Dress!


Professional photos by Hayley Stein Photography (c) 2025
Comments